Turn Your Pet into A Painting in Photoshop!
- Jan 19, 2016
- 1 min read
There’s no friendship like the one you can have with your pet. So celebrate your love for your dog or cat by turning them into art! In this tutorial, we’ll use Adobe Photoshop and pen tablet to paint a charming portrait of a cat. You’ll learn how to utilize Photoshop’s layer blend mode’s and preset brushes to make the process much easier.
Software: Adobe Photoshop CC and Wacom Intuos Draw Tablet Difficulty: Advanced Completion Time: 5 hours
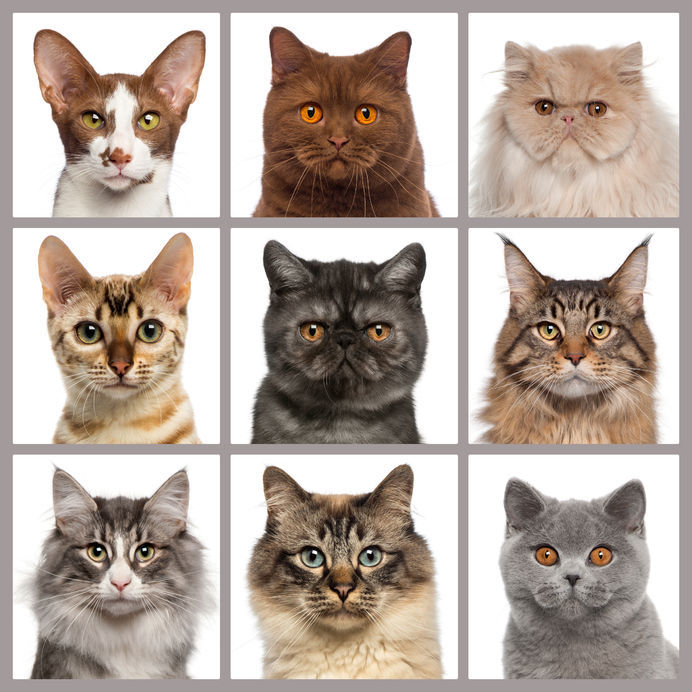
Images Used For This Tutorial

Step 1 Let’s get started! Open your cat reference in Photoshop. Since there are several cats here, let’s crop the photo for the cat we would like to use using the Crop Tool (C).
You can enlarge the photo so that you can see it slightly better by going to Image > Image Size and increasing the dimension size. In this case, set the width and height to 600×635 pixels.
Step 2 Now create a new document for your portrait. Go to File > New and set the dimensions for 8×8 inches with at 300 dpi.
Unlock both windows and set them side by side like this. This will allow you to see your pet as you draw and paint it.
Sketch the Cat Step 3 Use a tapered brush from Photoshop’s preset brush list. A pen tablet is needed for this step because Photoshop will use the pressure sensitivity to allow you to paint better. Fill the background layer with a light gray color (#e4e7e8). Add a Gradient Overlay to the background by right-clicking the layer and going to Blending Options. Add a Black and White Gradient Overlay at a scale of 150%.
Use a new layer to begin sketching the outline of the cat using a dark gray color. Break your sketch into many layers if you need to. Add some guidelines to help you with the placement of the facial features.
Step 4 Draw one eye first. When you’re finished, hold Control-J to create a copy of the eye on its own layer. With the layer for the new eye selected, go to Edit > Transform > Flip Horizontal. Position the flipped eye into place so that you have the other eye.
Continue this process for other parts of the face that could be flipped. This will help save you much time and give your painting better symmetry.
Step 5 Draw more details of your pet like the cat’s stripes and fur pattern to help you understand the placement of everything as you paint. When you’re finished your sketch should look like this. You can draw a chat bubble with a little heart in it for a cute effect. Merge all the sketch layers together.
Step 6 Now let’s start painting! Use a solid round brush with 100% Hardness to fill in the cat with a warm color on a new layer underneath the sketch. Right-click the sketch layer to set it as a Clipping Mask to the cat fill. Then set the layer Blend Mode to Color Burn. This step helps blend the sketch with the orange color.
Step 7 For the next steps, keep adding new layers set as clipping masks to the cat’s color. This will help to lock all your paint in place so that it doesn’t go outside the cat. Now set a new layer to Multiply and begin painting the base shadows for the cat.
Pick up the color from the cat with the Eyedropper Tool (I) then use that same color to paint the shadow. The color will automatically darken because the layer is set to Multiply. Keep painting in more shadow using a smooth brush with pen pressure sensitivity enabled for Opacity.
Add a rich green color for the eyes, and red undertones for the ears and nose. Paint a cute red heart for the chat bubble too!
Step 8 Now use a Chalk Brush from the preset brush panel to begin painting texture for the fur.
Step 9 Let’s add some highlights! On a clipped layer set to Linear Dodge (Add) use white and bright warm colors to add highlights to the cat. Make sure the highlights are around the edges of the fur to represent the light coming in from behind.
Step 10 On the same layer, or a new layer set to Linear Dodge (Add) use the color white to paint strokes of fur all around the cat.
Utilize the Normal blend mode to clean up the cat fur. Paint more dark brown in the areas where the patches of fur are darker.
Step 11 Now use a layer set to Multiply to add in some shadow. Choose a medium gray color to paint all over the cat in order to make the shading more realistic.
Step 12 Leave the remaining highlights and bright hairs for the last step. Paint with the color white to add highlights all around the cat and for the cat’s whiskers.
I hope you enjoy your new pet portrait! Print it out and show it to your pet, and let us know how you liked this tutorial in the comments!


Comments