Learn How To Create a Neon Pastel Magazine Cover
- Jun 5, 2018
- 6 min read

An eighties-inspired color palette is given a fresh update with on-trend gradients in this neon pastel magazine cover design. This tutorial is a great introduction to creating magazine covers and other print layouts in InDesign. We’ll also dip into Photoshop to edit the photo for our cover. Ready to start designing? Awesome, let’s dive in!
What You’ll Need to Create Your Neon Pastel Magazine Cover
As well as access to both Adobe InDesign and Adobe Photoshop you’ll also need to download the following photo and font files:
Gilroy ExtraBold
Save the photo to a safe place and install the font onto your computer. Then you’re ready to get started.
How to Prepare Your Neon Pastel Magazine Cover Photo
Step 1
Open the portrait photo in Photoshop. Duplicate the Background layer, to preserve a copy of the original image, and switch off the visibility of the original layer.
Go to Select > Color Range and click once onto the white background of the image. In the window that opens adjust the Fuzziness slider until you have a pretty good selection around the silhouette. It doesn’t need to be perfect as we can tidy it up after. Click OK to exit.
Click on the Refine Edge button on the Controls panel at the top of the workspace. Check Smart Radius and adjust the Smart Radius and Shift Edge sliders to tighten the selection. Then click OK.
Hit Delete on your keyboard to remove the selected white background.
Step 2
Place a rectangle set in a bright color under the Background copy layer, so that you can identify any remaining areas of background.
Use the Lasso Tool (L) to loop off remaining areas of the background, and use the Refine Edge window to tighten the selection. Then Delete the selection.
Work your way around the image, removing any unwanted pieces of background using the same process.
Step 3
When you’re finished, switch off the visibility of the colored rectangle, working only on the Background copy layer.
From the Adjustment menu at the bottom of the Layers panel choose Channel Mixer.
Check the Monochrome box, and adjust the color sliders until you have a black-and-white photo with a nice balance of contrast.
Step 4
Then choose Levels from the Adjustment menu.
Slide the left-hand and right-hand stops along, with the aim of increasing the contrast in the image between light and dark.
When you’re happy with the result head up to File > Save As and save the image as a Photoshop (psd) file. Name it something memorable, like ‘Portrait_edited.psd’.
How to Set Up Your Magazine Cover in InDesign
Step 1
Open up InDesign and go to File > New > Document.
Choose Print from the options along the top of the window. Set the Width of the page to 8.5 in and Height to 11 in. Uncheck Facing Pages.
Keep the Margins to their default value and add a Bleed of 0.25 in to all edges except the Left edge*.
*If you want to expand your cover later into a full wraparound design, you can use the Page Tool (Shift+P) to expand the page. Not having a bleed on the left side will make the sizing of this more accurate.
Then click Create.
Step 2
Expand the Layers panel (Window > Layers) and double-click on the Layer 1 name. Rename this layer Background and click OK. Choose New Layer from the panel’s top-right drop-down menu and name this layer Shapes Behind. Create a further five new layers in this order—Typography Behind, Photo, Shapes in Front, Typography in Front and finally Sunglasses at the top of the pile.
Lock all layers except Background, which we’ll work on first.
Step 3
Expand the Swatches panel (Window > Color > Swatches), and choose New Color Swatch from the panel’s top-right menu. Set the Color Mode to CMYK, and the values to C=0 M=68 Y=3 K=0. Click Add and then OK. Repeat to create eight more CMYK swatches in a rainbow neon pastel palette:
C=0 M=41 Y=45 K=0
C=52 M=0 Y=43 K=0
C=47 M=9 Y=2 K=0
C=26 M=62 Y=0 K=0
C=2 M=24 Y=69 K=0
C=29 M=3 Y=97 K=0
C=59 M=0 Y=4 K=0
C=0 M=63 Y=36 K=0
Step 4
Choose New Gradient Swatch from the Swatches panel’s menu.
Name the swatch Gradient 1, set the Type to Linear and choose Swatches from the Stop Color menu. Click on the left-hand stop on the Gradient Ramp and choose C=0 M=68 Y=3 K=0 from the menu above. For the right-hand stop choose C=0 M=41 Y=45 K=0.
Step 5
Repeat to create a second gradient swatch, naming this Gradient 2. For the left-hand stop choose C=52 M=0 Y=43 K=0 and choose C=47 M=9 Y=2 K=0 for the right-hand stop.
Create a third and final gradient swatch, naming this Gradient 3, and choosing C=0 M=63 Y=36 K=0 for the left-hand stop. Choose C=59 M=0 Y=4 K=0 for the right-hand stop. Click onto the Gradient Ramp to add two more stops, evenly spaced along the ramp, with the left set to C=29 M=3 Y=97 K=0 and the right to C=2 M=24 Y=69 K=0.
How to Create the Design of Your Cover
Step 1
Working on the Background layer, select the Rectangle Tool (M) and drag across the whole page, extending it up to the bleed edge.
Set the Fill of the shape to Gradient 2.
Step 2
Lock the Background layer and unlock the Photo layer.
Create a large image frame across the page using the Rectangle Frame Tool (F), and File > Place. Navigate to your saved ‘Portrait_edited.psd’ image, and Open, allowing it to fill the page.
Step 3
With the image frame selected, go to Object > Effects > Drop Shadow.
Click on the colored square next to the Mode menu to open the Effect Color window. Change this to C=0 M=68 Y=3 K=0 and click OK.
Set the Angle of the shadow to 180 Degrees, and add about 7% Noise, before clicking OK.
Step 4
Use the Rectangle Tool (M) to create a rectangle over the lower third of the page, setting the Fill to Gradient 1.

With the rectangle selected go to Object > Effects > Transparency, and bring the Opacity down to 65%.

Click on Gradient Feather at the bottom of the panel’s left-hand menu. Set the Angle to 90 Degrees, to allow the gradient to become more transparent towards the top edge of the rectangle. Then click OK.

Step 5
Lock the Photo layer and unlock the top layer, Sunglasses.

Zoom into the sunglasses lens on the left side. Take the Pen Tool (P) and trace around the edge of the lens (excluding the frame around it), looping it round to create a complete shape.
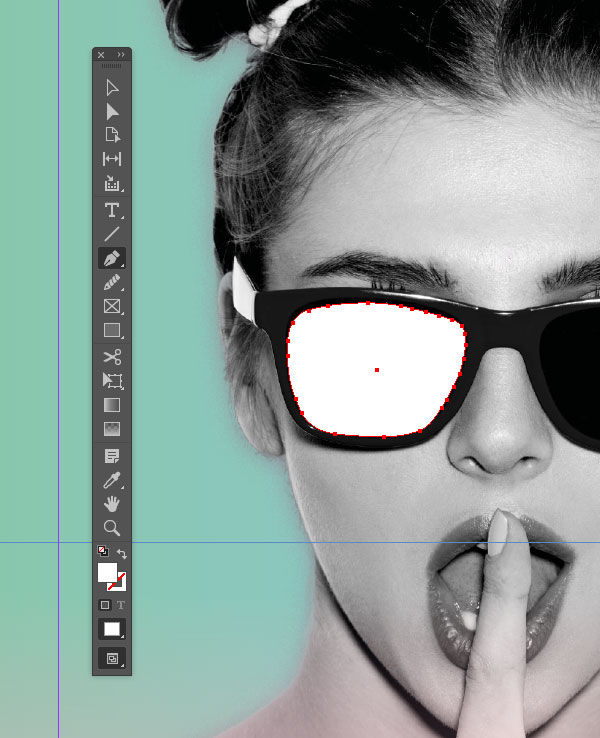
Switch to the Smooth Tool and drag your cursor over the edge of the lens, smoothing out any jutting edges or irregularities.

Step 6
Select the lens shape and Edit > Copy, Edit > Paste it. On the copy, Right-Click > Transform > Flip Horizontal.

Move the lens into position over the right side of the sunglasses.

Then switch the Fill Color of both lens shapes to Gradient 1.

Step 7
Lock the Sunglasses layer and unlock the Shapes Behind layer.

Switch to the Ellipse Tool (L) and, holding Shift, drag across the page to create a large circle behind the model’s head. Set the Fill Color to Gradient 3.

Step 8
Use the Rectangle Tool (M) to create a long narrow shape across the top third of the circle, setting the Fill of this to Gradient 1.

Add a small circle to the end of this using the Ellipse Tool (L), setting the Fill to Gradient 1 too.

You can add a couple more rectangles to the right side of the cover using the Rectangle Tool (M), setting one in Gradient 2 and another in the lavender swatch, C=26 M=62 Y=0 K=0.

Step 9
Unlock the Shapes in Front layer.

Add another rectangle and circle shape across the left side of the model’s shoulder, setting the Fill of these to Gradient 2.

Add another rectangle set in Gradient 1 over the right shoulder.

How to Format Typography on Your Cover
Step 1
Lock both Shapes layers and unlock the Typography Behind and Typography in Front layers.
Working on the Typography Behind layer, use the Type Tool (T) to create a small text frame over the top-left corner of the cover.
Type in the first part of the magazine title, and from either the top Controls panel or the Character panel (Window > Type & Tables > Character), set the Font to Gilroy ExtraBold, Size 75 pt, keeping the Font Color to default [Black].
Step 2
Add a small text frame to the top-right corner of the cover, listing the issue number (in [Black]) and date (in [Paper]), set in Gilroy ExtraBold, Size 20 pt.
Place text frames with article teasers down the right side of the cover, set in Gilroy ExtraBold, Size 32 pt, and Font Color to [Paper].
Step 3
Working on the Typography in Front layer, create a text frame for the second half of the magazine title.
Set the Font to Gilroy ExtraBold, Size 59 pt and a [Paper] Font Color.
Select the text frame and Right-Click > Transform > Rotate 90 Degrees CW.
Move the text frame into position below the first letter of the first half of the title, in the top-left corner.
You can add one more final article teaser on this layer, in the bottom-left corner of the cover.
Conclusion: Check Out Your Finished Neon Pastel Magazine Cover!
And there we have it! Your cover artwork is finished, great job!
You can either export your cover as a stand-alone image (go to File > Export and choose JPEG or PNG for sharing your image online or incorporating into an EPUB), or expand the cover into a wraparound design with a spine and back cover using the Page Tool (Shift+P), before going to File > Export and choosing PDF (Print) for professional printing.


Comments