[Halloween Special] Create A Quick & Easy Skull Effect
- Oct 21, 2016
- 3 min read
Level: Advanced Program: Photoshop CS6, Windows 10 Time: 4 hours
What We Will Be Learning: In this tutorial, we will be learning how to create a frame out of various branches, We will also be learning easy shadow technique and how to make a quick and easy Halloween skull effect.
This tutorial assumes you have knowledge of basic Photoshop functions such as adjustment layers, layer masks, and layer effects.
Images Used: Texture: image #32205544
Branches: #18157194, #18891062, #19245170, and #23783392 @marigranula
Forest: #44048760 @Denys Bilytskyi
Skull: #9507390 @Vladislav Ivantsov
Note: At the end of each step there is an image of what my layers look like at the point of that step in case you get lost!
Step One: Creating the Background First, we are going to put together a simple texture background.
1. Create a color fill layer and set it to a muted dark blue (#0c1320). 2. Find a grungy texture (image #32205544), and resize it to the image of your canvas. Turn it to black and white if it is not already. 3. Set the texture to “Overlay”.
1. Create a new layer and set it to “Soft Light”.
2. With a very large soft round brush paint white in the middle of your canvas and black in the outer corners.
3. Create another new layer and set it to “Overlay”. Using the same brush as before paint more white in the middle.
Group all these layers together and name the group “Background”.
Layers:

Step Two: Tree Frame This is a very striking, but surprisingly easy effect. We will need several tree branch images: images #18157194, #18891062, #19245170, and #23783392 and any others you can find.
1. Extract all your branches from their background.
I made a duplicate of all the original branches, just in case I needed them for later. I duplicated the branches and then put one set of branches into a group named “Original Branches”, then hid that group. This is optional.
Arrange all your branches so that they form a circle. Duplicate, resize and flip branches as you need to. This will take a bit of time, but it’s very simple. Work on it till you are happy with the shape!
Group all your branches together into a group named “Tree Frame”. Now, we are going to turn out wood dark/black.
1. Create and clip a Gradient Map adjustment layer into your Tree Frame group, and have it go from the color #0d3c49 to the color #110000. Set the opacity to 57%. 2. Create and clip a Color Balance layer above your Gradient Map. Set it to Red -45, Green -4 and Blue 80. 3. Above that Create and clip a Black and white Gradient Map layer. Set the opacity to 36%.
Create and clip a Curves layer. Settings:
1. Mask out the outer edges of the Curves layer using a soft round brush so that the middle of the branch frame is darkened. 2. Clip a Brightness/Contrast layer above the Curves layer. Settings: Brightness -36 and Contrast 74. 3. Create and clip a new layer above all the layers in your tree frame so far. Set it to Soft Light. 4. Using a soft round brush paint black on the inner and top half of the frame, and white on the bottom portion. Set the layer to around 50% opacity.
To add some easy lighting and shading we are going to add an Inner shadow and an Inner Glow to our Tree Branch group.
Add an inner glow with the settings you see below:
Add an Inner Shadow with these settings:
Result:

To finish up the frame, go back into your group, and erase all the branch parts that you don’t want there. Think of it like trimmer a tree, get rid of the distracting or ugly branches.
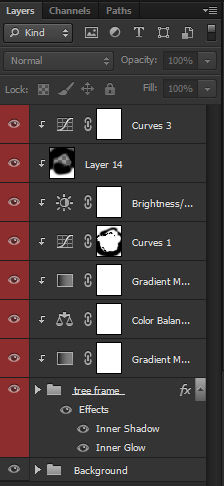
Layers:
Step Three: Adding a Picture Every frame needs a picture, a spooky forest is more than fitting for this one.
1. Find a foggy forest image (image#44048760) and resize it to where it fits behind your frame. Erase any leftover image with a hard round brush.
Create and clip a Curves adjustment layer into your forest image. Settings:
Clip a Color Lookup layer above the Curves layer. Settings: Night From Day.
Create, but do not clip, a Curves layer above your forest layer. Settings:
Result:

Layers:

Step Four: Shadows Next, we are going to add a shadow to out frame to make it more dynamic.
1. Duplicate your tree frame group and merge it together. Bring that merged layer below your forest layer.
2. Go to Image > Adjustments > Hue/Saturation: Lightness -100 to make the image 100% black.
3. Use the Warp mode of the Transform Tool to pull the shadow up.
1. Using the lasso Tool with a high Feather amount (the amount will depend on the size of your image) select the top half of the shadow and add a strong Filter > Blur > Gaussian Blur. Again the amount will depend on your image. 2. Select a little bit more of the shadow and blur it more. 3. Remove the selection, and add a tiny bit of blur to the rest of the shadow.
1. Add a layer mask to your shadow. Using a large soft round brush set to a very low opacity (20%), slowly mask out the top of your shadow so that it fades. 2. Using a harder brush, mask out any pieces of shadow you do not want showing, which is most of the shadows on the lower half of the frame.

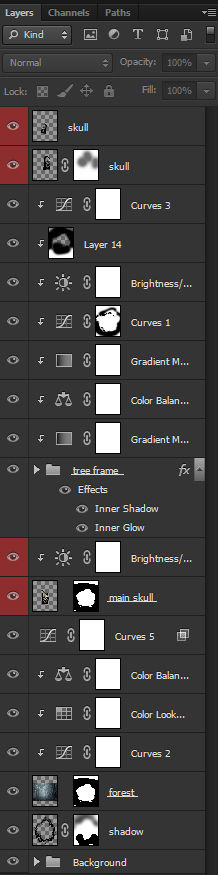
Layers:

Step Five: Adding the Skull Here is a very quick and easy way to add a ghostly effect to any image. In this case, we will be using a skull.
1. Find and image of a skull (image #9507390) and position it above your forest, but behind your frame and in the middle of your frame. Set it to “Screen”.
1. Set the opacity to around 55%. 2. Duplicate your skull and place it slightly above and over your original skull. 3. Using the Warp Tool, Distort the duplicate skull just like you did the frame’s shadow.
1. Create a selection around the duplicate skull and add a Filter > Blur > Radial Blur. The amount will depend on the size of your image, play around and experiment. 2. Add a layer mask to your duplicate skull and fade out the top of the skull using a soft round brush.

Do the same to a second skull but place it on the opposite side of the original skull.
Finally, using the Smudge Tool with a 55% Strength, click and pull up on your original skull to create lines and swirls coming off of it.
Layers:
Step Six: Fog Adding fog is one of the easiest ways to add atmosphere to an image!
1. Find an image of fog (image #2451170) and resize and place it at the bottom of your canvas. Set it to Screen. You can use the Transform Tool’s Warp mode to warp is some as well.
1. Create and clip a Color Balance layer into your fog. Settings: Red -34, Green -1, and Blue 43. 2. Create and clip a Brightness/Contrast layer above that. Settings: -150 Brightness and 100 Contrast.

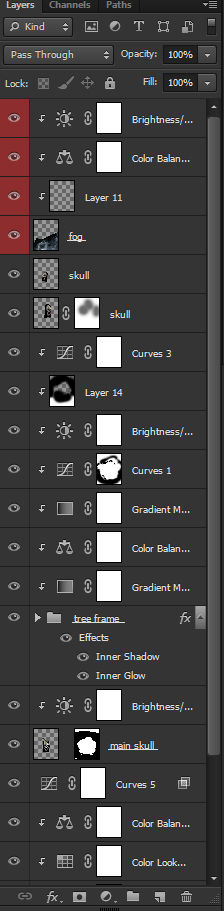
Layers:
Step Seven: Final Color Correction Finally, to bring our whole image together we are going to add some adjustment layers that will give out image it’s final colors. These are listed from bottom to top. The Curves layer is the top.
1. Color Lookup layer: Crisp Winter, 50% Opacity 2. Color Lookup layer: Foggy Night, 27% Opacity 3. Color Lookup layer: Horror Blue, 42% Opacity 4. Curves Layer:
Final Result:

Final Layers:

And you are done! Remember to always experiment and try your own techniques and have a Happy Halloween! As always, we welcome any tutorial suggestions. Just let us know in the comment box below!
Other Halloween Tutorials You Might Like To Try


Comments